Server Logs
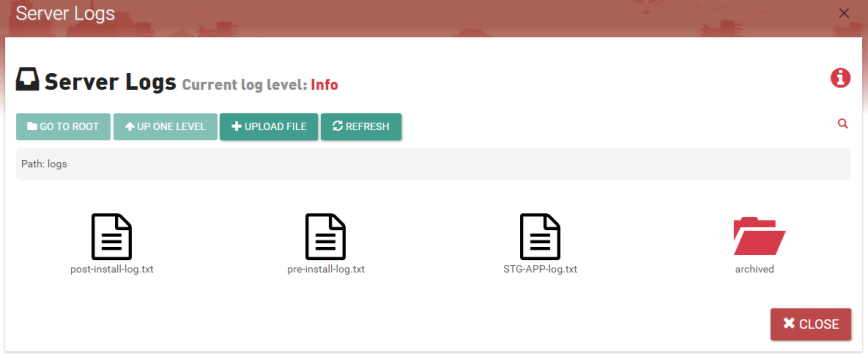
The Server Logs feature is a web interface that allows system administrators to view the server log activity and diagnose errors. The Server Log includes the time stamp, log level, and detailed messages from the application including a post-install-log.txt, pre-install-log.txt and a primary [app-name]-log.txt file. The saved logs from the previous day are automatically sent to an archived folder.

Usage
- Double click the log.txt file to view the server log in a Grid View.

- You can change the view to text by clicking Text View.

- Click Grid View to return to the original view.
- Click View Details next to an item in the log to view more details.
- Click Refresh to refresh the log.
- Click Close File to return to the main log directory.
- Double click the archived folder to open it.
- Double click the log.txt file to view the server log in a Grid View.
Note: You can change the view to text by clicking Text View.
- Click View Details next to an item in the log to view more details.
- Click Refresh to refresh the log.
- Click Close File to return to the main log directory.
- Double click the log.txt file to view the server log in a Grid View.
- Click the search icon to expand the search field.
- Start typing the name of an item in the log.
- The list will update to show all matching items.
The Filter options lets you filter the log level, times, and messages in the log.
- Double click the log.txt file to view the server log in a Grid View.
- Click Filter.
- Enter the criteria for the log level, times, and/or messages you want filtered into the applicable box.
Tip: Click Filter again to close the filter and refresh the log.
- Double click the log.txt file to view the server log in a Grid View.
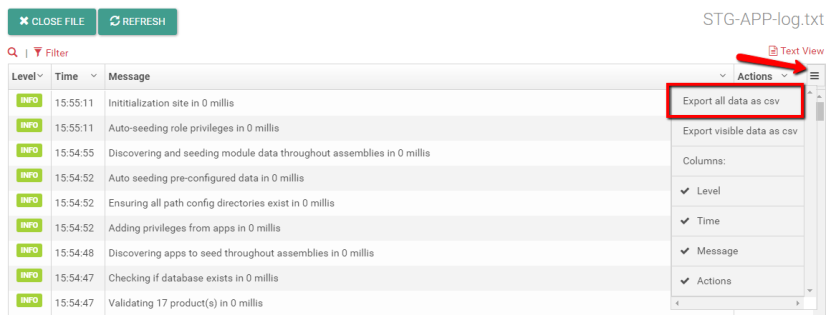
- Click hamburger icon in the top right hand corner of the grid and select Export all data as csv from the dropdown.

- The log will download to your computers downloads folder in csv format.
Tip: If server log does not download, check your browser settings to verify that pop-up blocker is not on.
- Right click on the log/folder you want to delete.
Heads Up! If you delete a log in this interface, it will be deleted in the application's server logs too.
- Click Delete.
- In the Confirm Delete popup, click Delete.
- Right click on the log/folder you want to rename.
- Click Rename.
- Once clicked, the report name will become an editable field.
- Enter your changes.
- Click any blank space on the page to exit editing mode.
Tip: Did you make a mistake and need to change it? No worries. Just repeat the steps above.
- Right click on the log you want to download.
- Click Download.
- The log will download to your computers downloads folder in txt format.
Tip: If server log does not download, check your browser settings to verify that pop-up blocker is not on.
- Click the +Upload File button.
- Select the file you wish to upload.
- Click Open to upload the file.
Note: You can change the logging level on the General Server Settings page.
